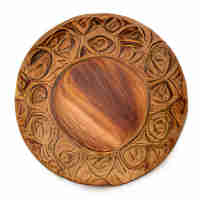
Wood carving a beautiful vintage teapot stand
It was last month's vintage stool cover design that got us thinking about ornate floral designs. To my eyes, classic arts and crafts designs are timeless and fit into almost any home. This month sees me pulling out the heritage woodcarving tools from the drawer. My particular tools were handed down from my father; Craft and handiwork seems to be handed through the ages. With a bit of practice it is possible to carve ornate designs that surpass any mass produced (and style-less) designs of today. At the end of this article is the free downloadable design featured here.
Lessons in Woodcarving (part 1)
For some time now I have devoted attention each month to special designs, acting on the assumption that those who follow these lessons have some notion of how the work is to be proceeded with. It is clearly impossible to deal with the question from the elementary stages each month, but I propose once more to run through, in a brief way, the early lessons on woodcarving, so that those who may have become readers of this journal since those instructions were given may be able to take up the art. I hope that it is unnecessary to reiterate what I have constantly said before, that I shall always be very happy to assist in their difficulties any of my readers who care to write to me. I shall give each month a design with a few instructions concerning it, so that those who are moderately advanced may still find something to interest them while these elementary lessons continue.
☆ ☆ ☆ ☆ ☆
First as to tools. I do not recommend too lavish an initial expense in this regard. A dozen tools is as many as will be needed at first. Roughly speaking, they may be divided into two classes; chisels and gouges. The chisels should range from 1/8 in. to 1in. Gouges, including V tools, should range from from 1/8 in. to 3/4 in. In addition must be named such miscellaneous implements as punches, routers, etc. If you are intending to go full-vintage then you will want to find hand-tool alternatives to today's cordless fantstics.
☆ ☆ ☆ ☆ ☆
Tools—sharpening—preliminary work
Next comes instruction for the sharpening of tools. It is obvious that this is one of the most vital questions for wood carvers. The tool may be handled with any amount of skill, but unless it has a good edge no really good work can be produced. Now as regards chisels, the difference between those used by carpenters and those for woodcarvers is that whereas the former are only sharpened on one side, the latter have both edges treated. An ordinary oil stone sharpening stones will do very well for the chisel, but the gouges, being curved implements, require small slips with which to work up the inside edge. V tools also are rubbed out from the inside with slips. In sharpening a chisel on an oil-stone, it should be worked in the same way as a plane. The gouges require to be rubbed from left to right to get the edge even. The fishtail gouge should have been mentioned as being an extremely serviceable one, especially for under-cutting work. The oil on the stone may be made two-thirds of sweet oil and one-third paraffin.
☆ ☆ ☆ ☆ ☆
Now a word as to woods. American oak, American walnut, satin walnut, and whitewood are among the most popular, and are all good for working on. Peartree is a little harder, and, of course, for certain work such hard woods as box and English oak are required. Suppose, then, we have a piece of whitewood, the first thing to do is to transfer to it the pattern we intend to carve. See our free-downloadable design below. The wood must then be clamped or screwed on to the bench. Clamping is the best method, and clamps must be included among the wood carver’s outfit. If the wood we are working on is not very big, it may be screwed on to a larger piece, and so clamped to the bench. We now proceed to stamp in the outlines with a chisel or gouge. When this is complete the ground is cleared away with one of the gouges. This work must be done as cleanly as possible, but it is probable that after all the ground will not be left as clear as might be wished. We finish, therefore, with a router, which is a small steel instrument forced through a piece of wood. The ground is scrubbed with this router until it is clean. Here I must leave the subject for the moment, to continue it in another lesson next month.
☆ ☆ ☆ ☆ ☆
As regards the design for a teapot stand given this month, a little special instruction is necessary. It must be recollected that a teapot is to stand on this board, consequently the carving must not be put in in high relief. What pattern there is, if carried out flatly, will not interfere with the purpose for which the board is made. Much difficulty is often found by carvers in getting objects to decorate which will fit the designs given. Accordingly this month I have selected a teapot board from the list of Messrs. Abbott Brothers, of Southall, which may be obtained through their agents, and which fits exactly the design.
Woodcarver
☆ ☆ ☆ ☆ ☆
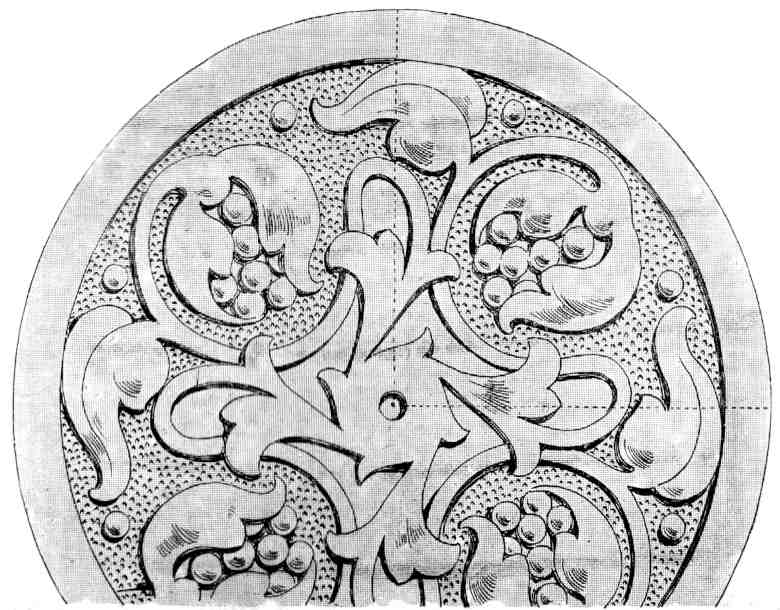
Free vintage teapot base woodcarving design
Unlock the beauty of vintage elegance with this free ornate teapot base woodcarving design. You can easily download and view the plan at your convenience. The plan provides a clear perspective in a plan view format, ready to be used as a guide for your next woodcarving project. The design, with its intricate details and classic charm, is available in PDF format, completely free of charge. Get started on creating a stunning piece of art with this vintage teapot base design.